KineBody Pro Instructions:
(last updated 240530)
Use Alternative Rendering
Overview
KineBody Pro AnimTools (subscription) include features for 'alternative rendering', which refers to ways to depict bones as transparent and/or with custom 'flat' coloration, instead of the standard 'illuminated 3D' view. This capability is provided primarily for use when you import and use a background image or video, as a pose template, to help distinguish the bones from the background image.
The alternative rendering methods described on this page apply to the entire set of bones together - they're not intended for coloring individual bones, e.g., to highlight a particular bone in contrast to its neighbors.
This page provides instructions for using the alternative rendering features, with a focus on operations involving a background image or video. Related instructions are available at these pages:

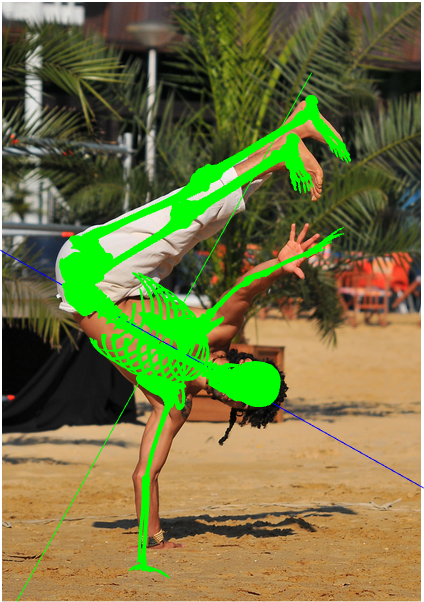
A common aspect of the alternative rendering methods is that they all derive from a 'comic' or 'line art' graphic style. This means they depict a 3D object using an outline of the object, and a flat-shaded (uniform) color for the interior of the outline, like that of a classic comic book or cartoon figure (as shown right). The outline and interior regions are typically different colors, but they can be the same color, if you want to show the bones as a colored silhouette.
Another special feature is that the bone interior regions can be shown as transparent. When coupled with a transparent background, this capability can be useful when fitting the skeleton over a 2D background template: the bones show as lines only, atop the background, allowing you to see image details that would be otherwise obscured. Furthermore, by changing the outline color, you can improve the contrast between the KineBody bones and the background image.

Comic style |
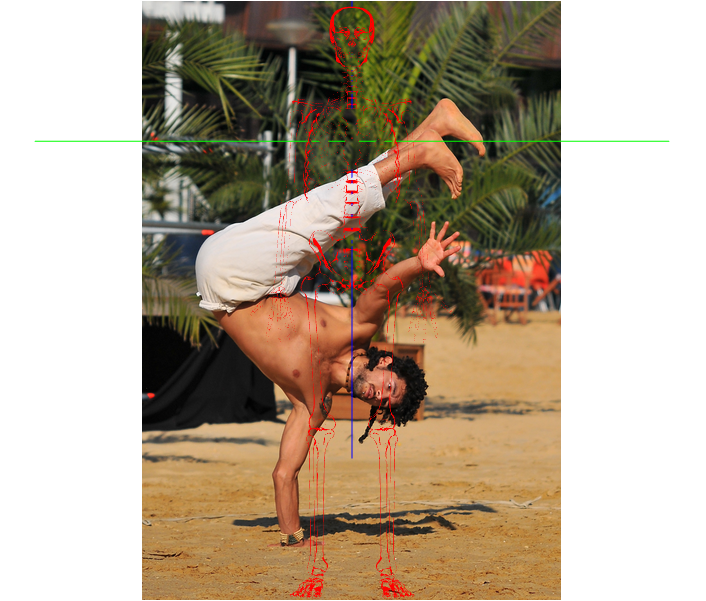
Transparent body |

Alternate outline color |

Fitted outline |
Silhouette |
Instructions
Controls for these features are located in the Show subpanel, bottom section: 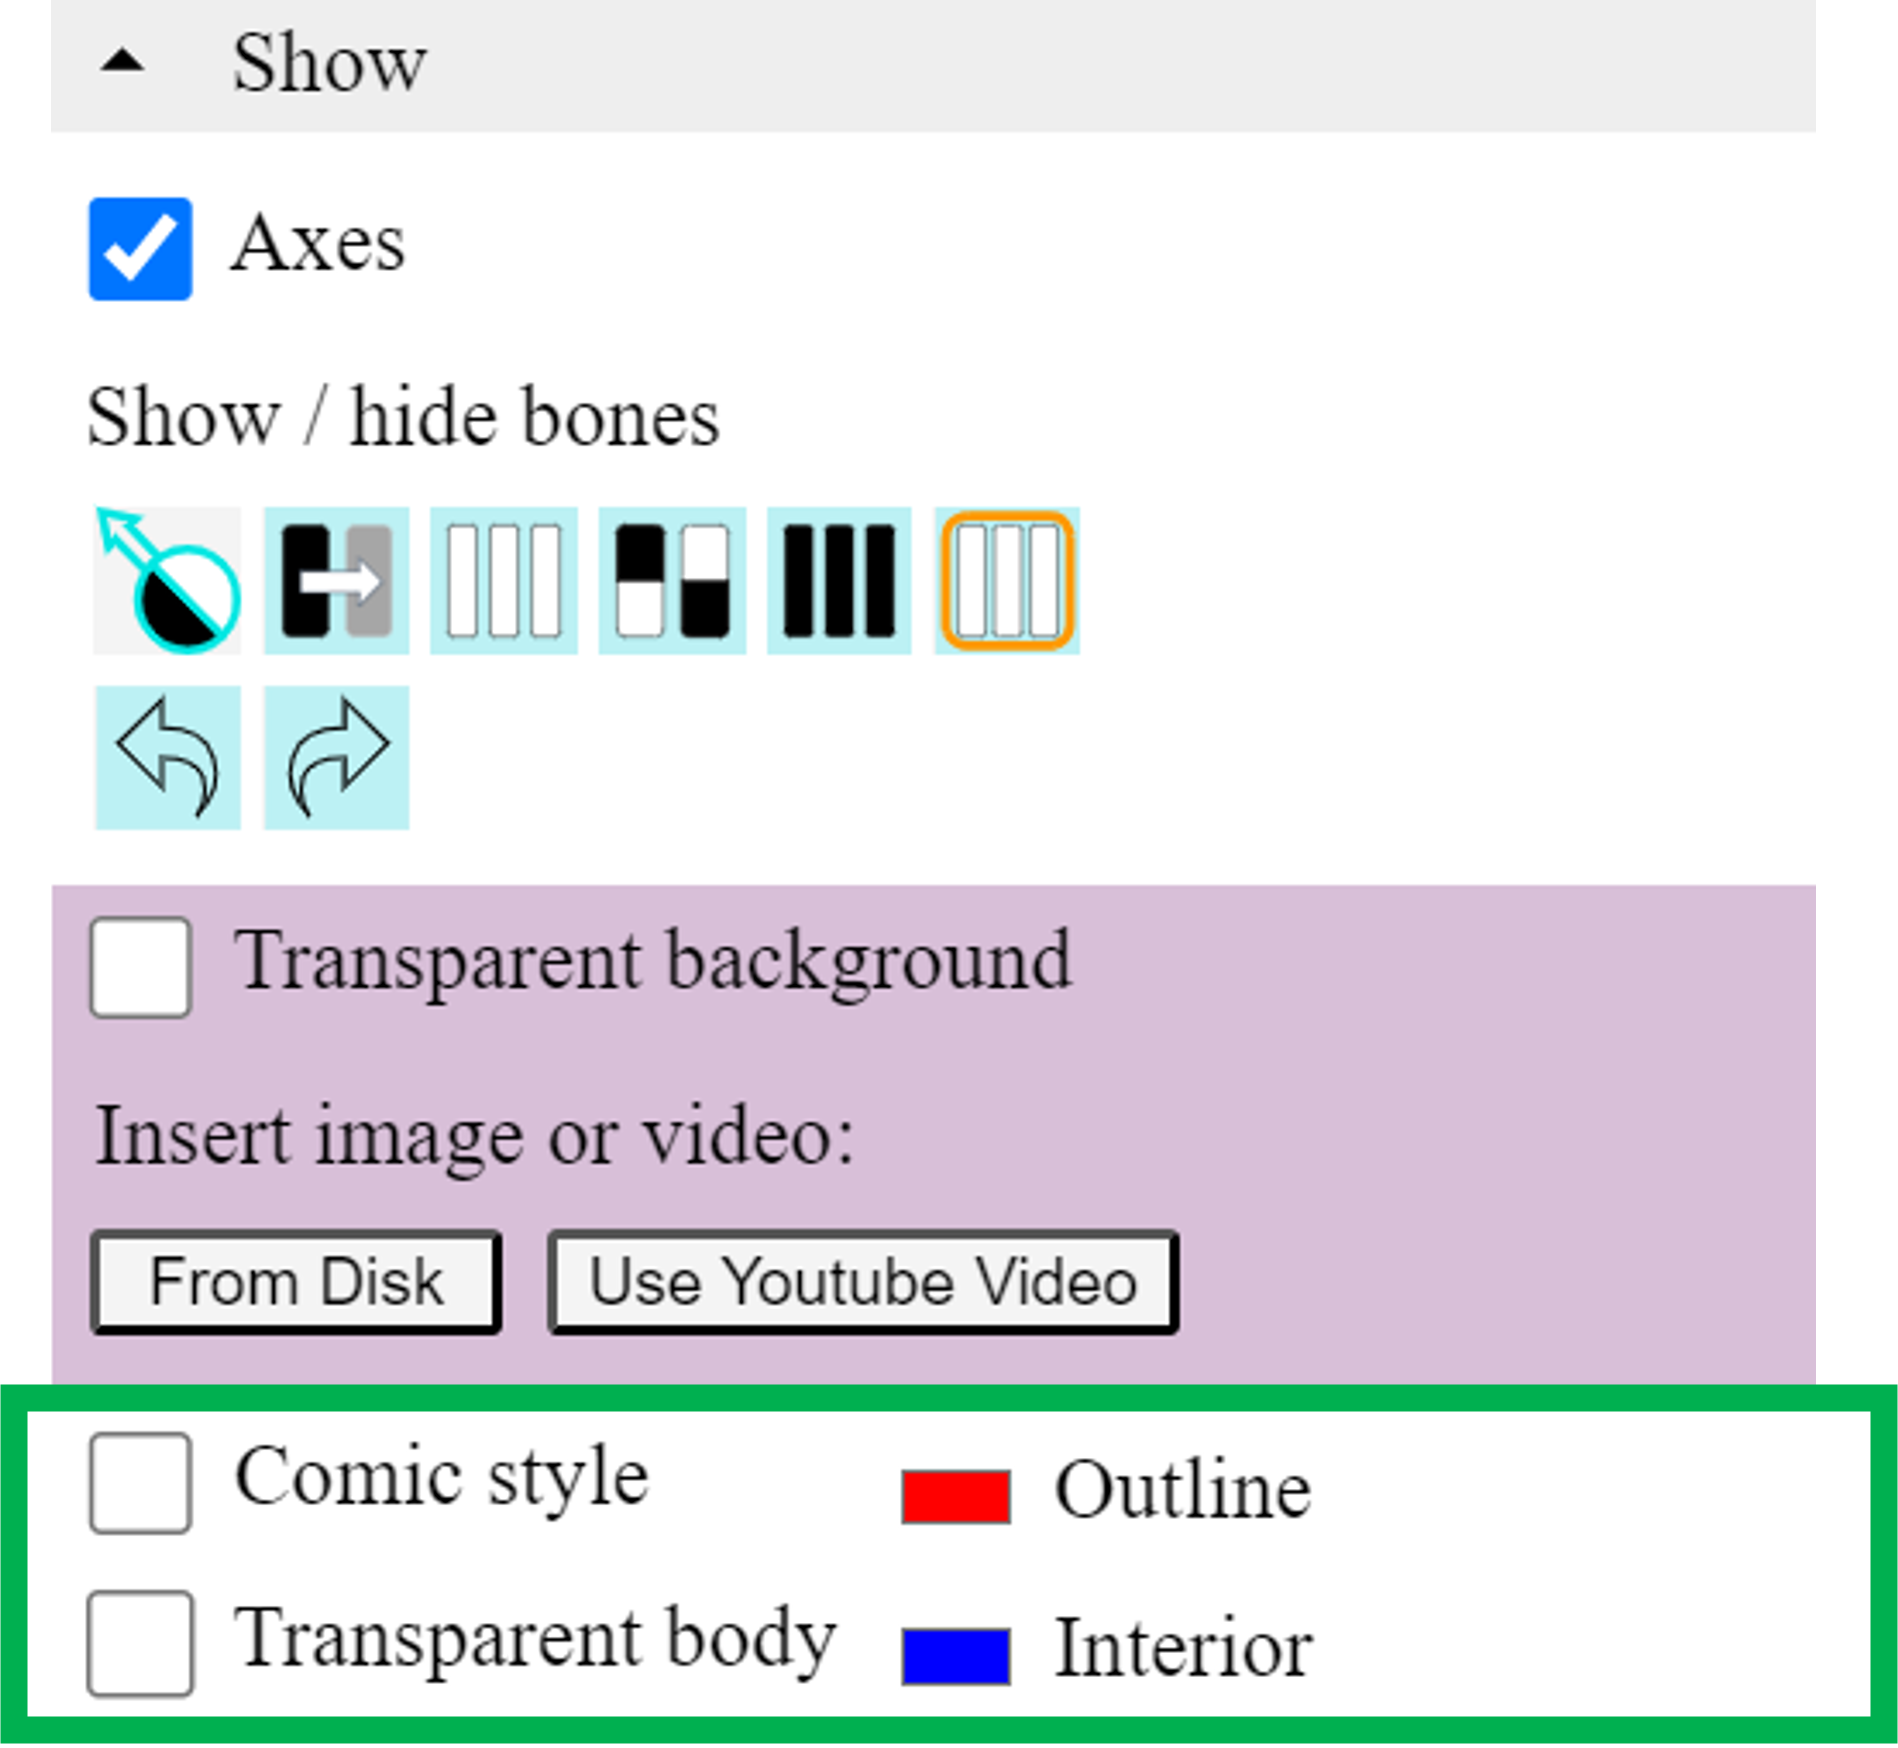
| To do this: | Proceed as follows: |
|
Enable alternative rendering
- or - Use comic style |
Check the box labeled Comic style.
When you first select this option, the skeleton is rendered in two contrasting opaque colors. |
| Change colors of outlines or interior | Click on the colored rectangle, next to either of the labels Outline or Interior.
A color selection panel (a.k.a, 'color picker') will appear; use it to select any available color. [Note that the color picker is provided by your platform or browser, so its appearance and features may differ from those shown here. Please consult the documentation for your platform or browser, for instructions or troubleshooting information]. 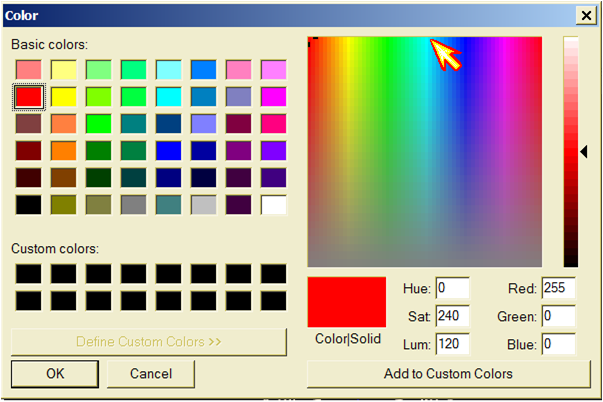
To highlight distinctions between the KineBody skeleton and a background image, select vivid, high contrast colors. |
| Make (comic style) interior regions transparent |
Check the box labeled 'Transparent body'
Note: this feature only works when the Comic style is enabled. See the Details section below for additional info about this feature. |
You may find it useful to change these options while you work: change the line color as necessary to contrast with portions of your image, use a silhouette instead of an outline, or revert to ‘illuminated 3D’ mode (by unchecking Comic Style), if the lines aren't sufficiently thick.
Details
Transparent body properties: When using the 'transparent body' option, the interior region of a bone has an unusual property: The transparency isn't a characteristic of the bone, but of the image. That is, you can't look through one bone to see a different bone behind it. Instead, the transparency applies thru all the 'layers of bones' (that line up 'depth-wise' in any viewing direction), until you reach the background image. This effect can be surprising or confusing, especially since you can still move the body or bones as if they actually exist in 3D.
To understand this, it helps to regard the rendering as a two step process: in the first step, bones are rendered in fully opaque comic style, with the selected Interior color applied inside the bone outlines, and projected onto a 2D plane image. Having done so, all of the depth (or distance) information about the bones is omitted/lost. Then, in the second step, the Interior color is made transparent. If you consider the the 2D image to be printed on a sheet of paper, this step is equivalent to 'cutting out' the interior regions of all bones, with a scissors.
If you then move any bones (e.g., using a slider) while the 'transparent body' is in effect, the two step process above is applied to each increment (or frame): the body or bone is moved, then projected onto a 2D frame and made transparent. As a result, the transparency appears to cut through all of the bones that align depth-wise at any point.
Undo/redo integration: Note that the comic style settings are not recorded in the Undo/Redo history. Likewise, there is currently no way to save alternative rendering options from the app, so if want to reproduce them in the future, you should record the settings in your notes: outline color, interior color (or transparent), e.g. rgb( 0, 0, 255).