KineBody Pro Instructions:
(last updated 240428)
Showing & Hiding Bones
Overview
The KineBody Pro PoseTools subscription includes tools that allow you to show and hide bones of the KineBody skeleton. Hiding a bone allows you to see details that would be otherwise obscured: for example, hiding the frontal bone of the skull allows you to view the skull’s interior. Showing a bone in isolation allows you to focus attention on it, and also to view details that are normally obscured by its neighbors. For example, you can isolate an individual vertebra, to examine the shapes of its articular surfaces.
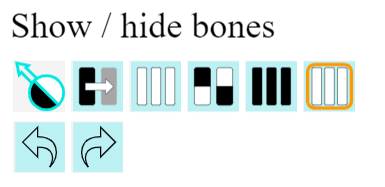
You can do many of the show/hide actions via buttons in the Show subpanel, at the right side of the KineBody Pro window. (Figure to right).
Other show/hide actions involve clicking or tapping within the viewing area; several of these are enabled via 'shortcut' keys, so, they require a keyboard. Here's a quick list of capabilities and requirements:
|
|
Brief Instructions
| To do this: | Proceed as follows: |
| Enter or Leave Show/Hide Bones (SHB) mode: |
To enter, press the 'SHB mode' button  . .
To leave, press the 'select joints' mode button  . .
- or - To enter or leave: Mouse: right-click on the viewing area; Touch: tap & hold (> 3 sec). |
| Hide an individual bone, by clicking or tapping on the bone: |
Mouse: when in SHB mode, click on the bone.
Touch: when in SHB mode, tap on the bone 1 or 2 times until it disappears. (i.e., once to identify it, then again to actually hide it). (The click or tap may change a group of bones, instead of an individual bone; to change between group and individual modes, see next box). |
| Show or Hide a group of bones, by click or tap: |
Press the Group mode button - or - For temporary group action (with mouse): when in SHB mode, hold [Alt][ z ] or [Alt][ . ], While in group mode, click/tap on any visible (or exposed) bone in the group. Click twice, if some bones in the group are hidden: 1st causes full group to show, 2nd causes hide. |
| Expose hidden bones, or, Make hidden bones completely invisible. |
Press the Expose button - or - Expose bones temporarily: hold [Alt][ x ] or [Alt][ / ] while hovering – & note you may need to move the mouse before the bones are exposed. |
| Show an individual hidden bone, by click or tap: |
(When in SHB mode, and bones are Exposed)
Mouse: Click on the bone to unhide it. Touch: Tap on the bone (1-2 times) to unhide it. |
| Show or hide All bones | Use buttons: |
| Swap hidden and shown bones | Use the Invert button |
| Undo/redo show/hide operations | Use buttons: Note that these undo and redo operations apply only to the bone visibility states – they do not apply to mode changes, i.e. SHB mode or Expose mode, nor to pose or joint selection changes. |
Details
About ‘Show/Hide Bones’ Mode: You can show &/or hide bones by clicking or tapping on the bones, but only after you change to ‘Show/Hide Bones’ (SHB) mode. In normal KineBody Pro operation, clicking/tapping of bones is used to select or deselect joints for movement (and to identify bones, when using touch input). You have to Enter the SHB mode to enable a click or tap to cause showing or hiding. Likewise, when you again want to click or tap to select a joint, you have to leave SHB mode.
Instructions for changing the SHB mode are provided above.
Several visual indicators are provided to show you the current SHB state:
-
For mouse input, the cursor colors indicate the SHB state:
 cursor means: click bones to identify bones &/or select joints.
 cursor means: click bones to show or hide them.
-
For mouse or touch input: a light blue border appears around the viewing area when SHB mode is active.
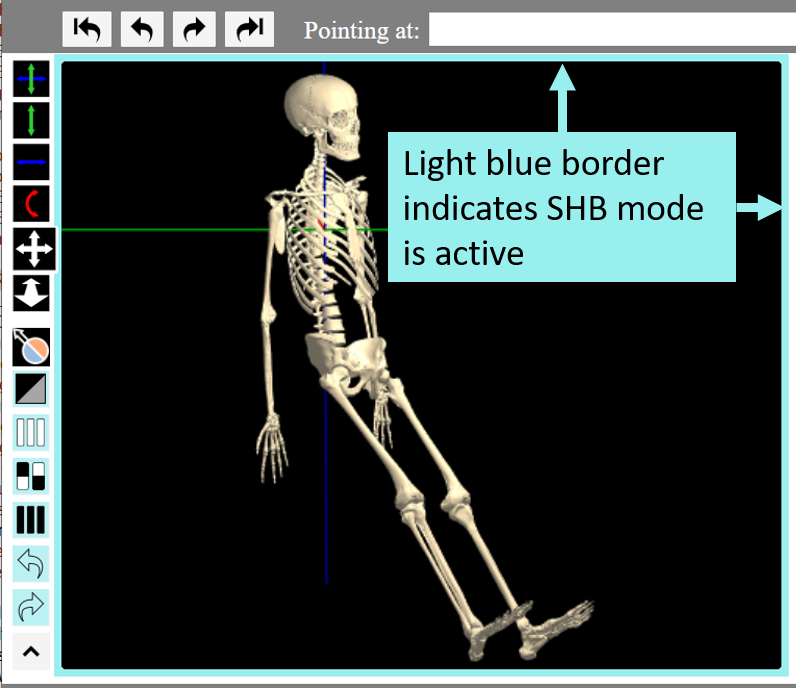
Also, messages appear briefly in the lower left of the viewing area:
Entering Show/Hide Bones Mode when the blue border appears.
Leaving Show/Hide Bones Mode, when the border disappears.
Finer points:
- You don't need to enter Show/Hide Bones mode to show or hide bones - SHB mode is only necessary if you want to click or tap to show or hide. You can alternatively use the toolbar buttons (Show All, Hide All, Invert, Undo/Redo) to do many show/hide operations, at any time: without regard for the SHB mode.
- When the Show/Hide Bones mode is active, you can do other operations, like moving the body or joints, using the techniques described in the basic KineBody Pro Instructions. The cursor will temporarily change to show the movement direction icons, while dragging.
About 'Expose' Mode: When you ‘hide’ a bone in KineBody Pro, you can depict it two ways: Invisible or Exposed, as shown in the figures below for the sacrum bone.
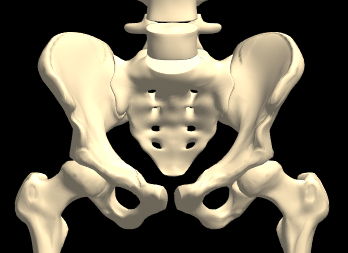
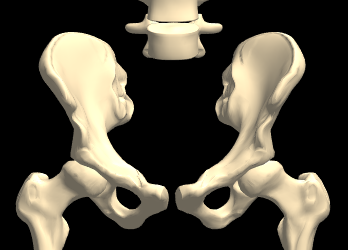
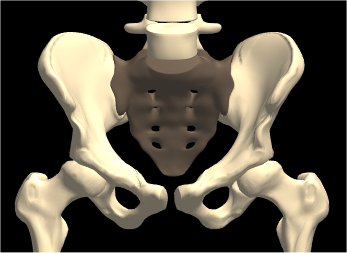
'Invisible' means exactly what it says: the bones aren't visible. ‘Exposed’ bones are visible, but shown in a dark color. Bones must be Exposed if you want to unhide them via click or tap (otherwise, there’s nothing to click on!).
To view bones in dark color, press Exposed mode button . To make bones fully invisible, press the 'Unexpose' button
.
If you’re using a keyboard, you can also expose bones temporarily, by use of shortcut keys: by holding [Alt][ x ] or [Alt][ / ] while hovering, the bones will be exposed. [Suggested mnemonics: 'x' = exposed; '/' = same key as '?', as in questioning where the bones are.]
Some finer points:
- It may be necessary to move the cursor, before the temporary exposed state kicks in.
- When hidden bones are exposed, the effect applies to ALL hidden bones; it's not possible to expose individual bones, i.e. some bones exposed, some not.
- You don't have to expose hidden bones in order to show them: you can use the toolbar buttons to Show All or Invert, or Undo/Redo a previous hide operation: these will work regardless of the Expose state.
About Bone Groups: You can show or hide multiple adjacent bones with a single action, via predefined ‘bone groups’. The groups and their contents are depicted below:
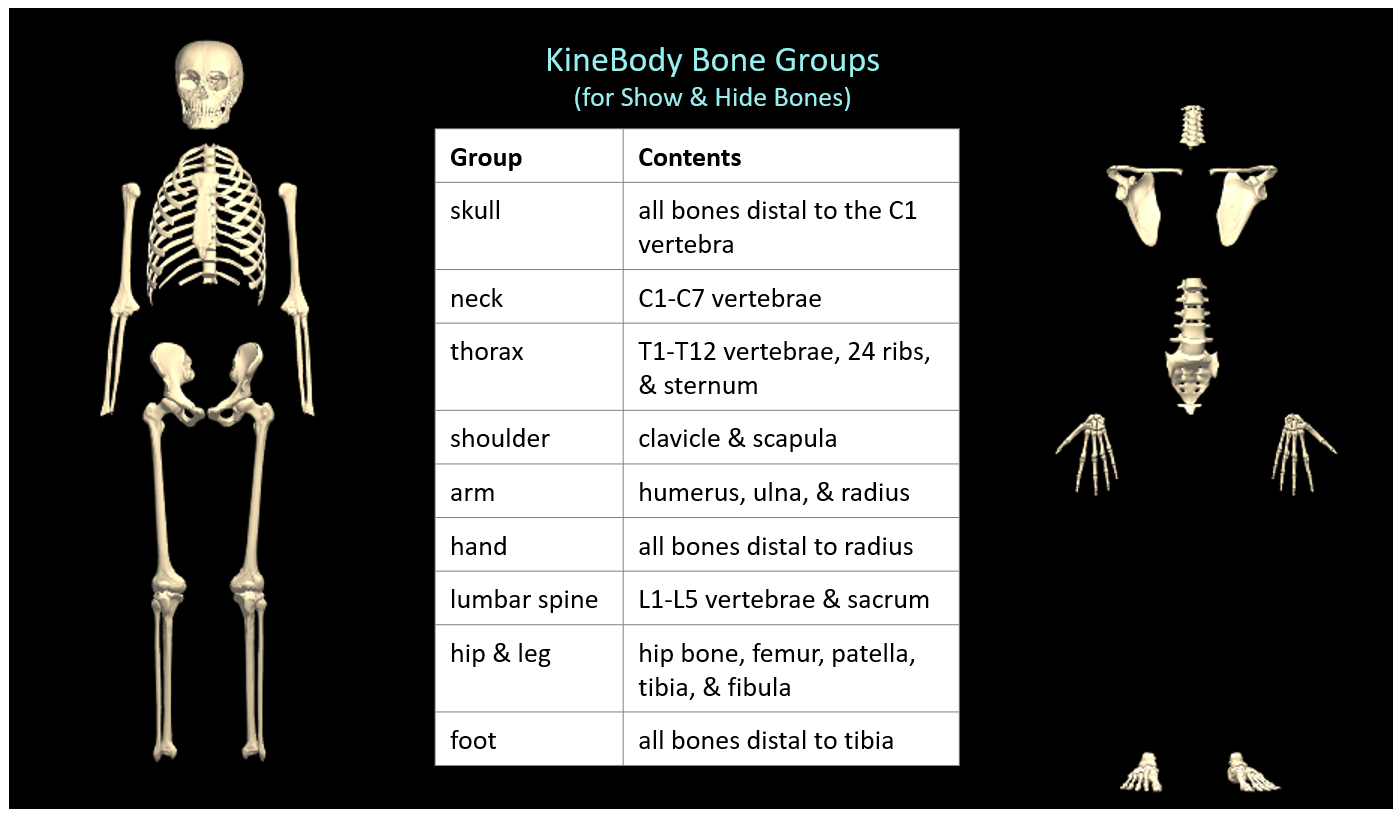
To show or hide a bone group, you have to be in SHB mode (see instructions above), and you have to have Group mode enabled. Select the latter via the Group mode button (see above), or, for temporary group mode, hold [Alt][ z ] or [Alt][ . ], while clicking on any bone in the desired group.
Some fine points:
- If all the bones in the group are hidden, one click will make all of them visible, and vice versa. If some of the bones are hidden, and some visible, the first click makes all of them visible, and subsequent clicks toggle that state.
- Note that bones must be Exposed, if you want to click on any hidden bones in the group. However, if any bone of the group is shown, you can click on that bone without need for Exposing the bones.
- You can combine shortcut keys: to temporarily expose bones AND to select a bone group, hold [Alt][ x ][ z ] + click (or some combination of other expose & group keys).
About Show/Hide Integration: As you experiment with the show & hide capabilities, you’ll see that they are conveniently integrated with other important features of KineBody Pro; however, they are not fully integrated. Here are some pointers:
Integrated with hover identification : When you hide a bone, to reveal some other previously obscured bone behind it, you can hover over the newly revealed bone and identify it. This may seem obvious, but it has ramifications: hovering over the location of an invisible bone doesn’t do anything - you can't identify it by hovering or tapping, and you can't click to show it. To do either of these, you have to Expose the bone first, to make it visible again.
Integrated with joint movement: When you hide a bone, it doesn’t become disconnected from its neighbors, it’s merely invisible. As a result, it will move (along with any distal neighbors) when you move any joint proximal to it.
Note that the special blue highlight used to indicate a selected joint (i.e., applied to the bone or group immediately distal to the joint) may be absent if that bone is hidden. However, when you Expose the bones, you can see the selected joint/bone indicator in a dark blue coloration.
Not integrated with the Fit function: The Fit feature adjusts all three body translations (horizontal, vertical, & distance), so that you can see the full skeleton centered in the viewing area. This behavior remains unchanged when bones are hidden: the translations are adjusted to accommodate the full skeleton, not just the visible bones.
Not integrated with 'Pose' Undo or Redo: The 'main' Undo & Redo buttons (in the app's top gray bar, next to 'Pointing at:') do not affect bone visibility. Instead, show & hide operations have their own dedicated Undo & Redo buttons, in the SHB toolbar.